
Digital Full-Arch Excellence:
A Case Study Using the Panthera Fusion Bar and the Shining 3D Elite

by Mark Chan DD, Andriy Khomyn DD RDT and Andreas Klie RDT

This article highlights the clinical journey from patient assessment to the final prosthesis delivery, emphasizing the integration of digital technology and a multidisciplinary approach to achieve optimal results.

Introduction

With the ever-changing technological advancements in the dental industry, clinicians are constantly trying to keep up with the rapid advancements made in the industry. This “Dental Jungle” is a huge challenge for many clinicians, so many questions and unknowns. Fortunately, there are now solutions for clinicians to help them navigate this daunting road of the future.

This article highlights the clinical journey from patient assessment to the final prosthesis delivery, emphasizing the integration of digital technology and a multidisciplinary approach to achieve optimal results.

What is intraoral photogrammetry (IPG)?

Based on 20 years of specialized research and development in high-precision 3D vision technology, photogrammetry has a ready been proven capable of achieving high accuracy for large-scale objects like airplanes, ships, and other significant structures.

SHINING 3D has taken a significant step further by innovatively applying its patented photogrammetry technology from high-end industrial applications to the dental field. This advancement delivers an extremely high-accuracy scanning experience, particularly beneficial for full-mouth edentulous dental implant applications.

It is called IPG – intraoral photogrammetry.

So, what makes IPG technology different compared to regular intraoral scanning?

Regular scanbody or scan flag scanning typically requires 360-degree scanning to capture its positions based on surface geometry features. This method often encounters issues due to insufficient features, particularly when scanning vibrating soft tissue between the scanbodies, or liquids such as blood or saliva, leading to a loss of scanbody positioning accuracy.

In contrast, IPG utilizes encoded patterns on scanbodies as accuracy control reference points for global optimization. This technology involves a comprehensive process of measuring and interpreting photographs to extract precise spatial information and creates highly accurate 3D data. One of the key advantages of IPG is that it requires significantly fewer perspectives to capture the scanbodies’ positions during the scanning process. This makes the scan workflow more efficient and avoids unnecessary accumulated errors.

Patient Presentation and Referral

The patient, a 73-year-old female, was referred for consultation regarding a full upper denture and a partial lower denture.

Key Findings

  • Upper Arch: Periodontally compromised with a poor prognosis for all remaining teeth.
  • Lower Arch: Retention of teeth 44, 43, 33, 34, and 37 was possible despite some pocketing.
  • Primary Concern: The patient experienced significant discomfort and mobility in the upper anterior teeth, making chewing difficult.

Referring Clinician’s Suggestions

  • Address both arches simultaneously for better occlusion.
  • Consider interim and final prostheses.
  • Coordinate surgical timing with denture readiness.

Denturist Examination and Treatment Plan Discussion

During my initial examination, the patient expressed strong opposition to a full upper denture with palatal coverage, citing concerns about taste alteration and discomfort. After reviewing all options, we decided on an implant-supported fixed solution (teeth-in-a-day) to address these concerns.

The patient was referred to Aspen Oral Surgery, where Dr. Martin Cloutier, a maxillofacial surgeon specializing in implant therapy, conducted a comprehensive evaluation and planned the following procedures:

Surgical Intervention

  1. Extractions: All maxillary teeth were extracted.
  2. Implant Placement: Seven implants were immediately placed in the maxilla.
    1. Six implants achieved high primary stability, enabling immediate function.
    2. A seventh implant was placed for potential inclusion in the final prosthesis.

Immediate Same-Day Conversion

After surgery, I performed the chairside conversion of the All-on-X provisional prosthesis.

Steps

  1. Provisional Prosthesis: Adapted to the implant positions and secured with Multi-Unit Abutments (MUAs) for immediate function.
  2. Fit and Function: Adjustments were made to ensure proper fit, function, and esthetics.
  3. Occlusal Verification: Undue stresses were minimized to protect the implants during healing.
  4. Night Guard: A transitional night guard was provided to reduce stress on the implants and promote optimal healing.

The immediate solution restored function and esthetics, greatly improving the patient’s confidence and comfort during the healing phase.

Six-Month Follow-Up

Oral Surgeon Review and Final Torque Test: After six months, the patient returned to the oral surgeon for evaluation. Dr. Cloutier performed a final implant torque test to ensure implant integration and stability. The Multi-Unit Abutments (MUAs) were retorqued to their recommended specifications to confirm the implant stability before the fabrication of the final prosthesis.

Digital Workflow: Scanning for the Definitive Prosthesis

On the same day, the patient returned to my office for the final prosthesis workflow.

Pre-Scan Preparation:

Temporary Prosthesis Assessment: The temporary fixed provisional was evaluated for fit and function.

Scanning Process Using the Shining Aoralscan Elite

A comprehensive scan was performed to record all anatomical landmarks, including the palate, residual ridge, implant positions and opposing arch.

  1. Before removing the temporary prosthesis, I captured a detailed pre-op scan. This step is important because the temporary acts as a guide for the final aesthetics and occlusion.

    I start by scanning the prosthesis in the patient’s mouth, moving systematically from the anterior teeth to the posterior region on one side, and then repeating the process on the other side. I ensure I capture all surfaces—the occlusal, buccal, and palatal. It is important to scan the soft tissue contours around the prosthesis.

2. Soft Tissue and Opposing Arch Scans. I removed the temporary prosthesis and completed a scan the upper arch soft tissues, including the residual ridges and palate, to capture all anatomical details.

I use smooth, steady motions to capture the entire arch and ensure there are no gaps or stitching errors in the data. I focus on areas that will interact directly with the prosthesis, ensuring a clear, detailed scan of the soft tissue.

Next is the opposing arch scan for occlusal alignment.

doubling

3. Implant Scan. Proper seating of the scan bodies is very important; if even one scan body isn’t fully seated, it can throw off the entire digital workflow.

doubling

First, I scan fiducial markers or reference markers, these markers serve as reference points that help the scanning software accurately identify and align the position and orientation of each implant. Fiducial markers are crucial for ensuring precise digital mapping of the implant locations, which is essential for designing and fabricating implant-supported prostheses.

doubling

Following fiducial markers scan, I start scanning the first few scan bodies and soft tissue areas around them. I then move to the other side of the arch, scanning all scan bodies on that side.

4. Next, I perform the bite registration. We reinsert the temporary prosthesis and make sure it’s seated properly before proceeding.

doubling

I ask the patient to bite into their natural centric occlusion and keep their bite steady. Then, I use the scanner to capture the buccal surfaces of both arches, starting at the midline and working my way to the posterior regions on both sides. The bite scan needs to show clear contact points and alignment. If there’s any discrepancy, I adjust and rescan as needed.

doubling

Stitching and Verification:

The scans of the implant positions and soft tissue were digitally stitched to create a seamless model.

Pre-Op Scan Integration:

The pre-op scan of the temporary prosthesis was overlaid with the implant scan data to guide the design of the final prosthesis.

I can manually inspect the alignment to confirm everything is accurate. If corrections are needed, I can easily address them at this point.

Finally, I export all the scan data as STL files and upload them to Panthera Dental. I include specific notes about tissue compression preferences, aesthetic requirements, and the reference points from the pre-op scan.

Tips

  • Take your time with the implant scan bodies. This is the foundation of the entire case, so precision is key.
  • Use the scanner’s AI features to highlight gaps or missed areas during scanning.
  • Always verify the alignment of your scans before sending them to the lab. Small errors now can cause big problems later.

    By following this workflow, I can ensure the prosthesis will fit precisely, function optimally, and meet the patient’s aesthetic expectations. The Shining Aoralscan Elite has become an indispensable tool in my practice, streamlining the process and improving outcomes for complex implant cases like this one.

Laboratory Phase

The digital scans were processed using exocad to design the patient’s final smile, with the temporary prosthesis serving as a guide. This allowed the design to closely reflect the aesthetics and functionality of the provisional while improving tissue adaptation and compression. Two different designs were produced to evaluate tissue compression as intaglio surface of the final will be finished in highly polished titanium.

doubling

Importance of Intaglio Surface Design

The intaglio surface (tissue-facing surface) of the prosthesis was carefully designed to be either flat or slightly convex. This is essential because:

  • A flat or convex intaglio surface minimizes soft tissue irritation and ensures even pressure distribution.
  • Avoiding concave designs reduces the risk of food entrapment and tissue overgrowth.
  • This design promotes healthier tissue conditions and provides a better seal.
doubling

Prototyping with 3D Printing

The intaglio surface (tissue-facing surface) of the prosthesis was carefully designed to be either flat or slightly convex. This is essential because

  • Evaluate Fit: Ensure accurate seating on the implants and proper tissue adaptation.
  • Verify Tissue Compression: Check the effectiveness of tissue support without causing discomfort.
  • Assess Aesthetics: Confirm the appearance and alignment of the final smile in relation to the patient’s facial features.
  • Implant Fit: Leveraging accurate implant scan data ensured that the bar would align perfectly with the implants, reducing stress and enhancing longevity.
  • Aesthetics: The pre-op scan of the provisional prosthesis provided a roadmap for replicating the desired smile, ensuring the patient’s expectations for appearance were met.

The Panthera Fusion Bar Restoration

Some major challenges faced by clinicians when doing full arch Zirconia restorations is the limitation of being able to extend the cantilevers due to small AP spreads. Another major concern are breakages, especially around the Ti base areas.

The PFB is Zirconia supported by a Titanium bar allowing the design to extend further in the cantilever and the even thickness of the Zirconia cemented onto the Titanium bar allows the elimination of Ti bases thereby eliminating the weak points created around the Ti Bases.

Using a unique splitting protocol Panthera is able to provide the customer with the overlay STL to manufacture their own restoration overlay in Zirconia, PMMA, Rodin or any other material of their choice.

doubling

Full Digital Workflow for the manufacturing of the PFB

Thanks to the Shinning Elite scanner and its software, we were able to fully integrate the Photogrammetry scans from Andriy into our workflow, designing and manufacturing the PFB for his patient.

The following scans were sent to Panthera as per the required scans to proceed with the design and manufacture of the PFB.

Tissue Scan

Tissue Scan

Post-Op Temp on the Model

Post-Op Temp on the Model

DESS Scanbody

DESS Scanbody

Post-Op Temp on the Model

Post-Op Temp off the Model

From the files received from Andriy Panthera is able to design the implant bar and overlay using the splitting protocol ensuring a straight milling line without any undercuts facilitating the production and fusion of the overlay to the bar. The PFB workflow is great in that it offers various workflow choices to the customer. One of the options, and in most cases the option of choice, the STL of the overlay is sent to the customer for them to then mill the overlay in-house in the material of their choice. For those who do not have their own milling machines or who would prefer to have Panthera mill the overlay for them, this is another popular option. This is also the option Andriy went with for this case.

DESS Scanbody
Post-Op Temp off the Model

Once the design was done, the case was available for Andriy to view in the 3D Viewer. The 3D Viewer shows the design of the bar in relation to the overlay.

DESS Scanbody
Post-Op Temp off the Model

The cross-sectional shows the space and shape of the bar in relation to the overlay. Each square represents 1mm so as can be seen in this case the bar at the highest point is 6mm and at the lowest point it’s 3mm. Once Andriy had approved the design the case was sent to production.

DESS Scanbody
Post-Op Temp off the Model

Milling and Finishing

Panthera offers various options for manufacturing cases. Andriy opted to have Panthera mill the zirconia. Panthera also sent the stl overlay to Andriy to mill or print any additional overlays if he needed to.

The Zirconia overlay was milled with Vita YZ® ST.

doubling

Andriy chose preparation A2 for the tooth base shade and Gingiva Light Pink.

DESS Scanbody
Post-Op Temp off the Model

The bar was trimmed polished and fitted on the model which was printed by Mark Chan for this case.

doubling

Panthera offers various combinations of bar finishes. Andriy chose the sandblast and anodizing option. This provides the surface texture recommended for cementation and the anodizing minimizes the dark grey titanium showing through the zirconia overlay.

DESS Scanbody
Post-Op Temp off the Model
doubling

The Bar and the milled Zirconia Overlay were shipped to Andriy for his Technician to complete the case.

DESS Scanbody
Post-Op Temp off the Model

Milling and Finishing

  • Upon receiving the Panthera Fusion Bar, the bar and prosthesis were evaluated and confirmed for optimal fit and function.
  • The final insertion went very smoothly, without any adjustments required.
  • The lower cast partial denture was modified to achieve ideal bite management, ensuring proper occlusion with the new upper prosthesis.
  • To protect the implants and maintain the occlusion, the patient was provided with a hard night guard.

    This workflow maximizes accuracy and efficiency, ensuring seamless digital capture, design, and final prosthesis delivery for full-arch implant cases. The smooth insertion of the Panthera Fusion Bar demonstrates the importance of precise scanning and careful planning in achieving predictable outcomes.
DESS Scanbody
Post-Op Temp off the Model
DESS Scanbody
Post-Op Temp off the Model

Patient Review

Following the procedure, the patient shared the following review:

I am not one for writing reviews. There isn’t anything more I can say that hasn’t already been written in all the others before this one. So I am just going to say thank you.

Andriy, you and your wonderful staff made a very distressing situation so incredibly easy. I know it might sound a bit strange under the circumstances, but it has been fun.

To the people reading reviews to possibly make a decision as to which denture clinic to visit—there is no better than Smile Care Denture Centre.

You will be so pleased you did.

Thank you again.

This heartfelt review reflects the positive experience and quality care provided throughout the process, highlighting the impact of a supportive and professional team.

This section highlights the clinical journey from patient assessment to the final prosthesis delivery.

doubling

Milling and Finishing

Mark Chan DD
SwissNF

DESS Scanbody

Andriy Khomyn DD RDT
Smile Care Denture Centre

DESS Scanbody

Andreas Klie RDT
Panthera Dental

DESS Scanbody
About

Shining 3D

Research & development of high-precision 3D digitizing and 3D printing technology since 2004. Established in 2004, SHINING 3D has been dedicated to the research, development, production, and application of high-precision 3D digital solutions for nearly 20 years. The company specializes in advanced 3D technologies and also manufactures state-of-the-art digital dental products, driving innovation and precision in the dental industry. SHINING 3D strives to be a global leader in 3D digital technology, promoting its widespread adoption and offering accessible, efficient, and high-tech solutions to industries worldwide. Headquartered in Hangzhou, China, SHINING 3D maintains a strong global presence with operations in Hong Kong, China; Stuttgart, Germany; and San Leandro and Tampa in the United States. In addition, the company has local representatives across the globe to provide personalized support and ensure seamless service for its customers worldwide.

DESS®

DESS® products are manufactured by Terrats Medical S.L., company with more than 70 years of experience in the manufacturing of precision mechanical components. DESS® Dental is present in more than 40 countries and offers the widest range of dental abutments and prosthetic solutions 100% compatible with the most popular implant systems in the market. The DESS® Dental abutments are conceived under the Pure Switch concept, which means they can easily replace any implant brand prosthetic parts. This concept gives the professional a great deal of flexibility, as he can use both the implant brand product and the DESS® product without losing any of its features. The Pure Switch responds to the need to create a prosthetic solution that can fully replace the implant brand without compromising the quality or strength of the product. All our abutments are tested to guarantee their correct functioning. Following this idea, the backbone of the Pure Switch concept is our screw, as it is identical to the implant brand and perfectly interchangeable. We offer easy-to-use and time-saving solutions.
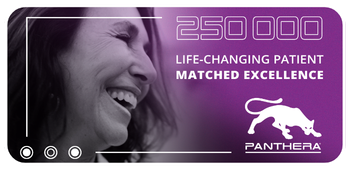
Panthera Dental

Panthera Dental is committed to design and manufacture custom-made dental restorations, sleep breathing disorder solutions and implantology products using proprietary CAD/CAM processes, smart manufacturing and superior quality materials. Panthera’s highly skilled and passionate team is dedicated to provide the highest quality outcomes and to deliver state-of-the-art solutions to dental, medical and sleep professionals who strive to improve patients’ quality of life worldwide. The Prosthetic division offers the widest variety of CAD/CAM dental prosthetic products on the global market and is renowned for its unprecedented product quality and its ability to offer the most comprehensive compatibility of implant connections and platforms. All Panthera Prosthetic products are 5 μm precision manufactured using high-speed 5 axis milling or CNC turning manufacturing and a wide variety of medical materials.

To learn more about the Panthera Fusion Bar, click here.

Continue your Prosthetic education

How-toProsthetic

Overcoming Dental Prosthetic Challenges

Join Andreas Klie, an experienced RDT, walks you through a comprehensive, multi-disciplinary patient case study designed to highlight the transition from complex clinical challenges to a predictable outcome.

How-toProsthetic

Magnet-X Integrated Bar Protocol

Specifically designed for the production of a dental prosthesis based on a Magnet X bar, this comprehensive tutorial provides dental laboratories globally with the exact steps needed to achieve a flawless, passive fit.

How-toProsthetic

The ReBourke bar concept by Andreas Klie

Designed by Ruth Bourke in California, and presented by Andreas Klie RDT, the ReBourke™ concept is an innovative double structure bar that gives patients the exact feel of a fixed restoration while remaining easily removable...

Get technical content delivered straight to your inbox

By clicking on “Submit”, you agree to our Privacy Policy and to receive Panthera’s latest news and promotional emails.

NEED MORE INFORMATION?

Canada (HQ)


9105 rue John-Simons
Quebec, QC Canada,
G2B 0S6
+ 1 (418) 527-0388

USA


22343 La Palma Ave, Ste 128
Yorba Linda, CA
USA 92887
+ 1 (418) 527-0388

France


38 rue Jean Mermoz
78600 Maisons-Laffitte
France,
+ 1 (418) 527-0388

Newsletter

By clicking on “Submit”, you agree to our Privacy Policy and to receive Panthera’s latest news and promotional emails.

+ 1 (418)-527-0388      [email protected]


Newsletter


By clicking on “Submit”, you agree to our Privacy Policy and to receive Panthera’s
latest news and promotional emails.